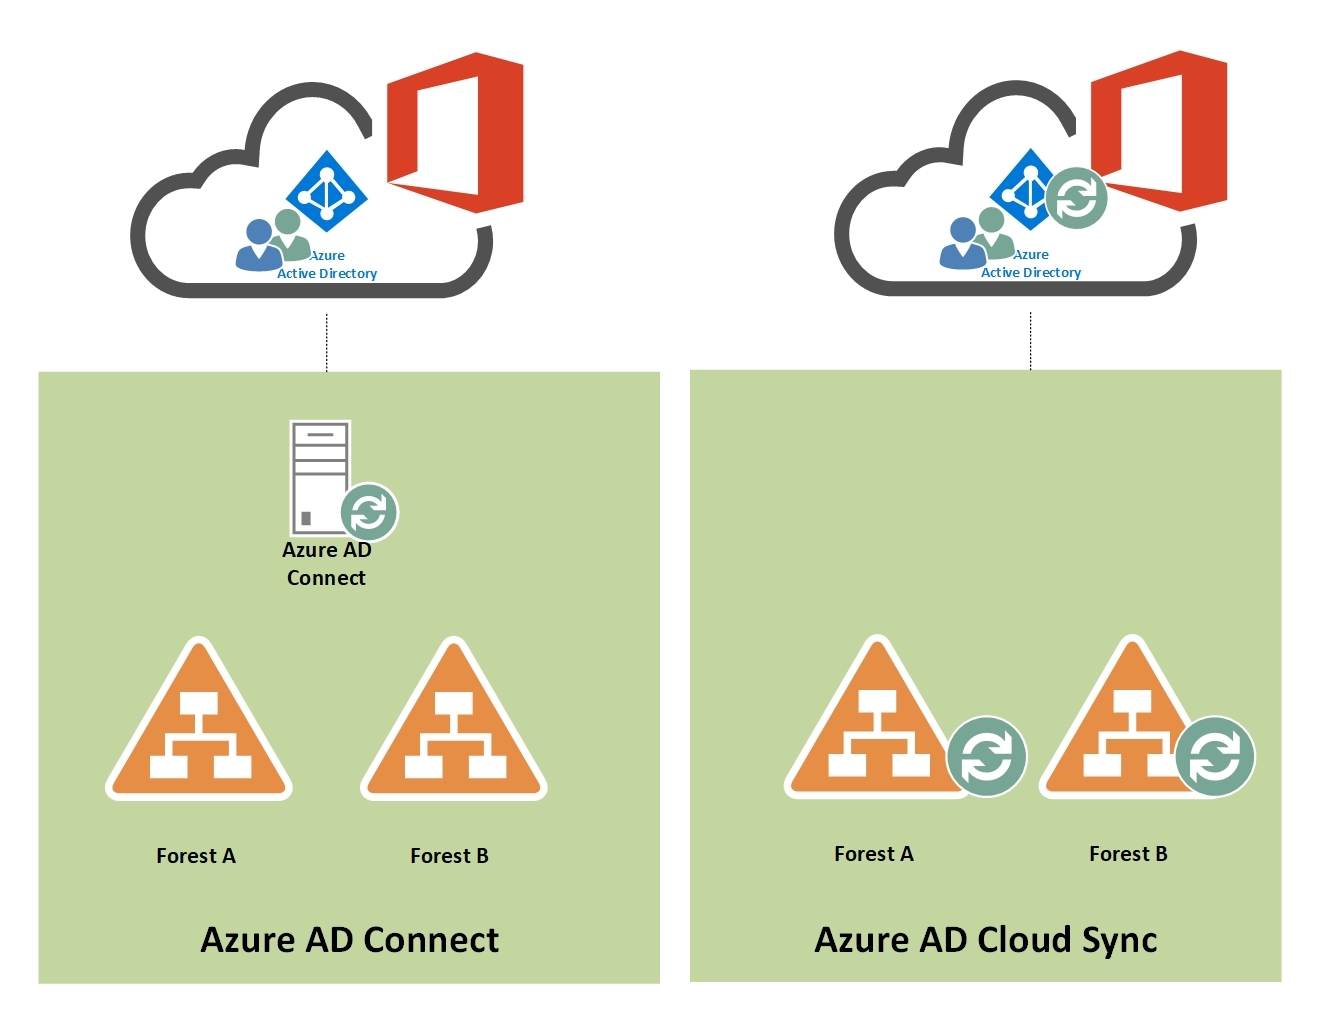
Configuration steps to enable your tenants for cross-tenant mailbox migrations
You must configure the target (destination) first. To complete these steps, you are not required to have or know the tenant admin credentials for both source and target tenant. Steps can be performed individually for each tenant by different administrators.
Prepare the target (destination) tenant by creating the migration application and secret
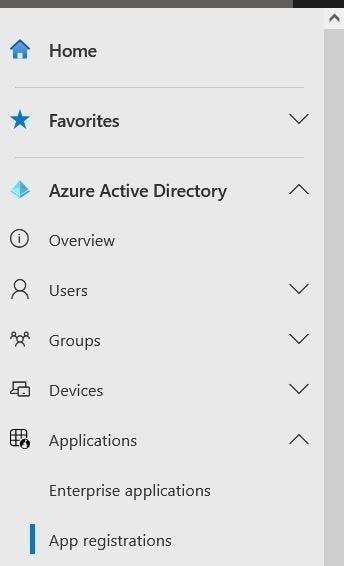
Navigate to Azure Active Directory admin portal > Applications > App Registration
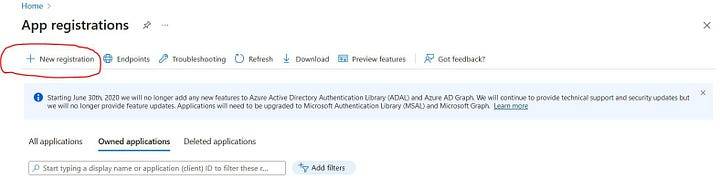
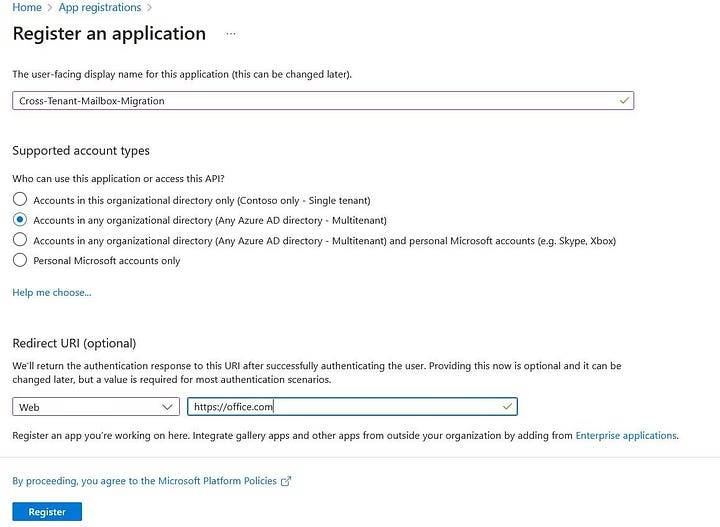
Under App Registrations click on + New Registration
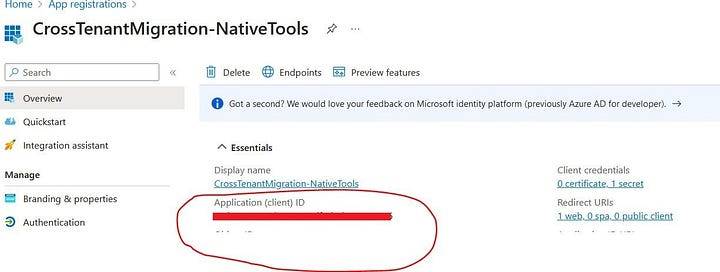
Note down Application ID:
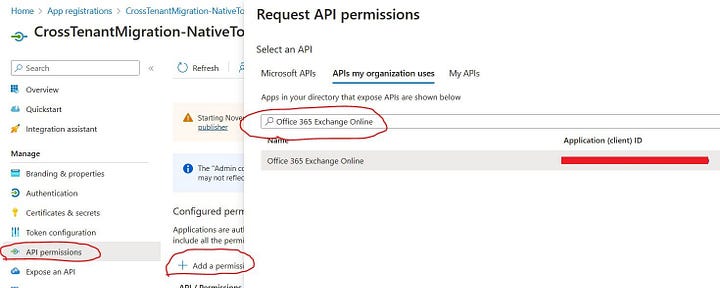
Next you need to add this permission “Mailbox.Migration“. Navigate to API Permissions > Add a Permission
Under Request API Permission click on APIs my organization uses and search by “Office 365 Exchange Online“
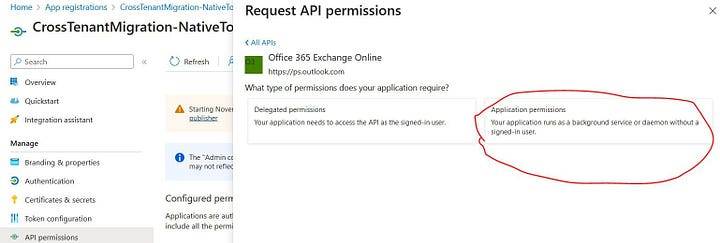
Click on Office 365 Exchange Online then select Application Permissions, under Mailbox check Mailbox.Migration and click on Add Permissions
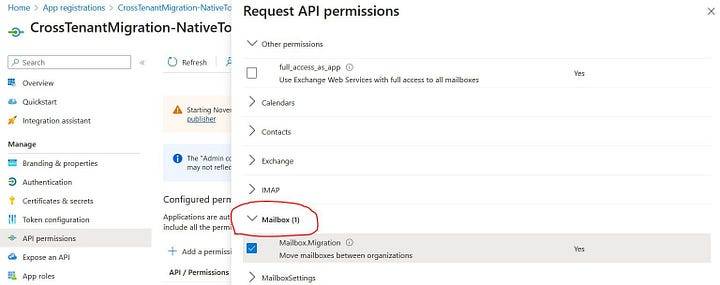
Make sure admin consent is granted

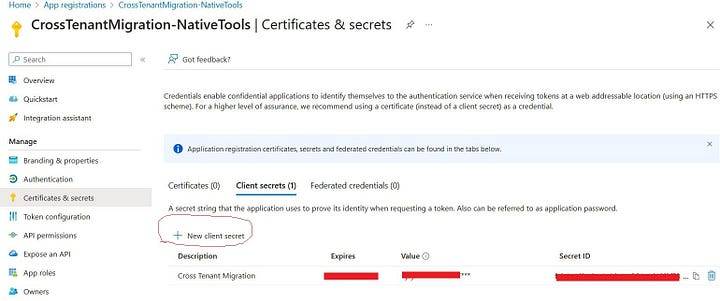
Next you have to create secret for Application, under Certificate & Secrets click + New Client Secret. Note down string value after creating secret.
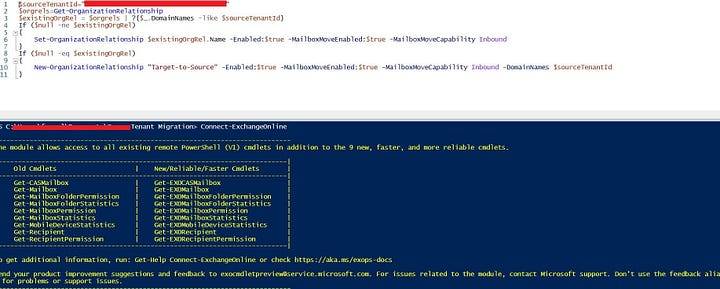
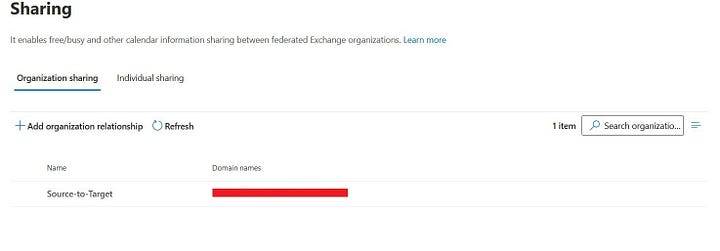
Configure Organization Relationship (Target Tenant)
Open up PowerShell and connect to Exchange Online and run this script
$sourceTenantId="Enter Source Tenant ID"
$orgrels=Get-OrganizationRelationship
$existingOrgRel = $orgrels | ?{$_.DomainNames -like $sourceTenantId}
If ($null -ne $existingOrgRel)
{
    Set-OrganizationRelationship $existingOrgRel.Name -Enabled:$true -MailboxMoveEnabled:$true -MailboxMoveCapability Inbound
}
If ($null -eq $existingOrgRel)
{
    New-OrganizationRelationship "Target-to-Source" -Enabled:$true -MailboxMoveEnabled:$true -MailboxMoveCapability Inbound -DomainNames $sourceTenantId
}"
Configure End Point Connector
Run this piece of script to do this
# Enable customization if tenant is dehydrate
$dehydrated=Get-OrganizationConfig | select isdehydrated
if ($dehydrated.isdehydrated -eq $true) {Enable-OrganizationCustomization}
$AppId = "Enter the Application ID which was created in previous steps"
$Credential = New-Object -TypeName System.Management.Automation.PSCredential -ArgumentList $AppId, (ConvertTo-SecureString -String "Enter the string value which is created in prevous steps" -AsPlainText -Force)
New-MigrationEndpoint -RemoteServer outlook.office.com -RemoteTenant "Domain Name of Source Tenant" -Credentials $Credential -ExchangeRemoteMove:$true -Name "Enter the connector name" -ApplicationId $AppIdd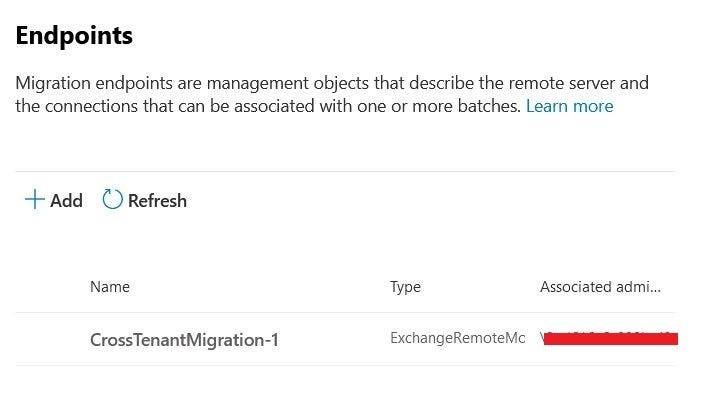
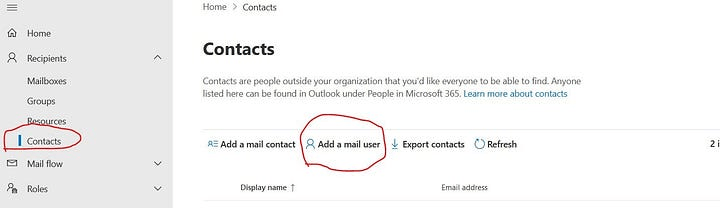
Preparing Target Users
Open up Exchange Admin Center, under Contacts > Add Mail User
You need to copy Exchange GUID and LegacyDN of Source Mailbox
Get-Mailbox -identity <user@domain.com> | fl
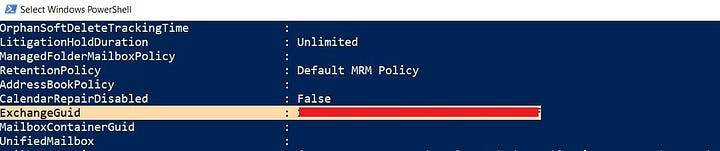

Now you need to set GUID and Legacy
Set-MailUser -Identity <user@domain.com> -ExchangeGuid "Enter here GUID"
Set-MailUser -Identity <user@domain.com> -EmailAddresses @{add="x500:/ Enter here complete address"
Preparing Source Tenant
Run the following script to establish organization relationship
Create a Mail-Enabled Security group and add members which you want to migrate.
$targetTenantId="Enter the Target Tenant ID"
$appId="Application ID"
$scope="testgrp1@domain.com"
$orgrels=Get-OrganizationRelationship
$existingOrgRel = $orgrels | ?{$_.DomainNames -like $targetTenantId}
If ($null -ne $existingOrgRel)
{
    Set-OrganizationRelationship $existingOrgRel.Name -Enabled:$true -MailboxMoveEnabled:$true -MailboxMoveCapability RemoteOutbound -OAuthApplicationId $appId -MailboxMovePublishedScopes $scope
}
If ($null -eq $existingOrgRel)
{
    New-OrganizationRelationship "Source-to-Target" -Enabled:$true -MailboxMoveEnabled:$true -MailboxMoveCapability RemoteOutbound -DomainNames $targetTenantId -OAuthApplicationId $appId -MailboxMovePublishedScopes $scope
}
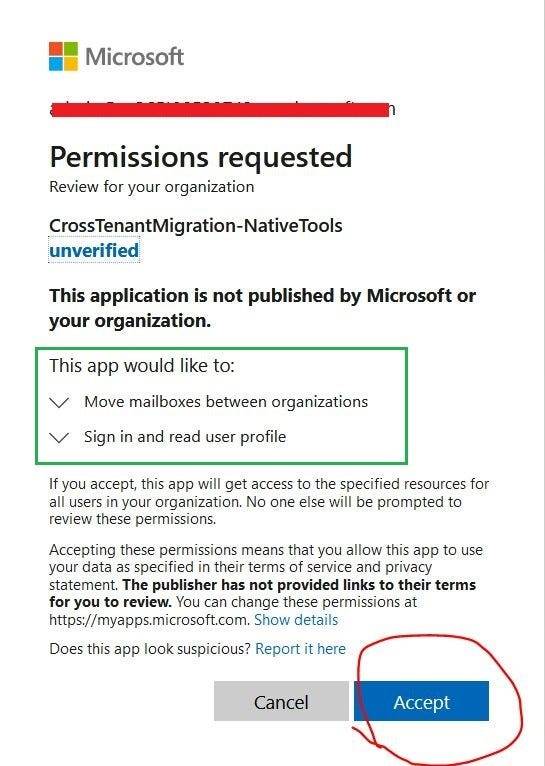
Granting consent on source side, use the following URL and replace your source tenant domain and Application ID.
https://login.microsoftonline.com/<Source Domain Name>/adminconsent?client_id=Your-Application-ID&redirect_uri=https://office.com
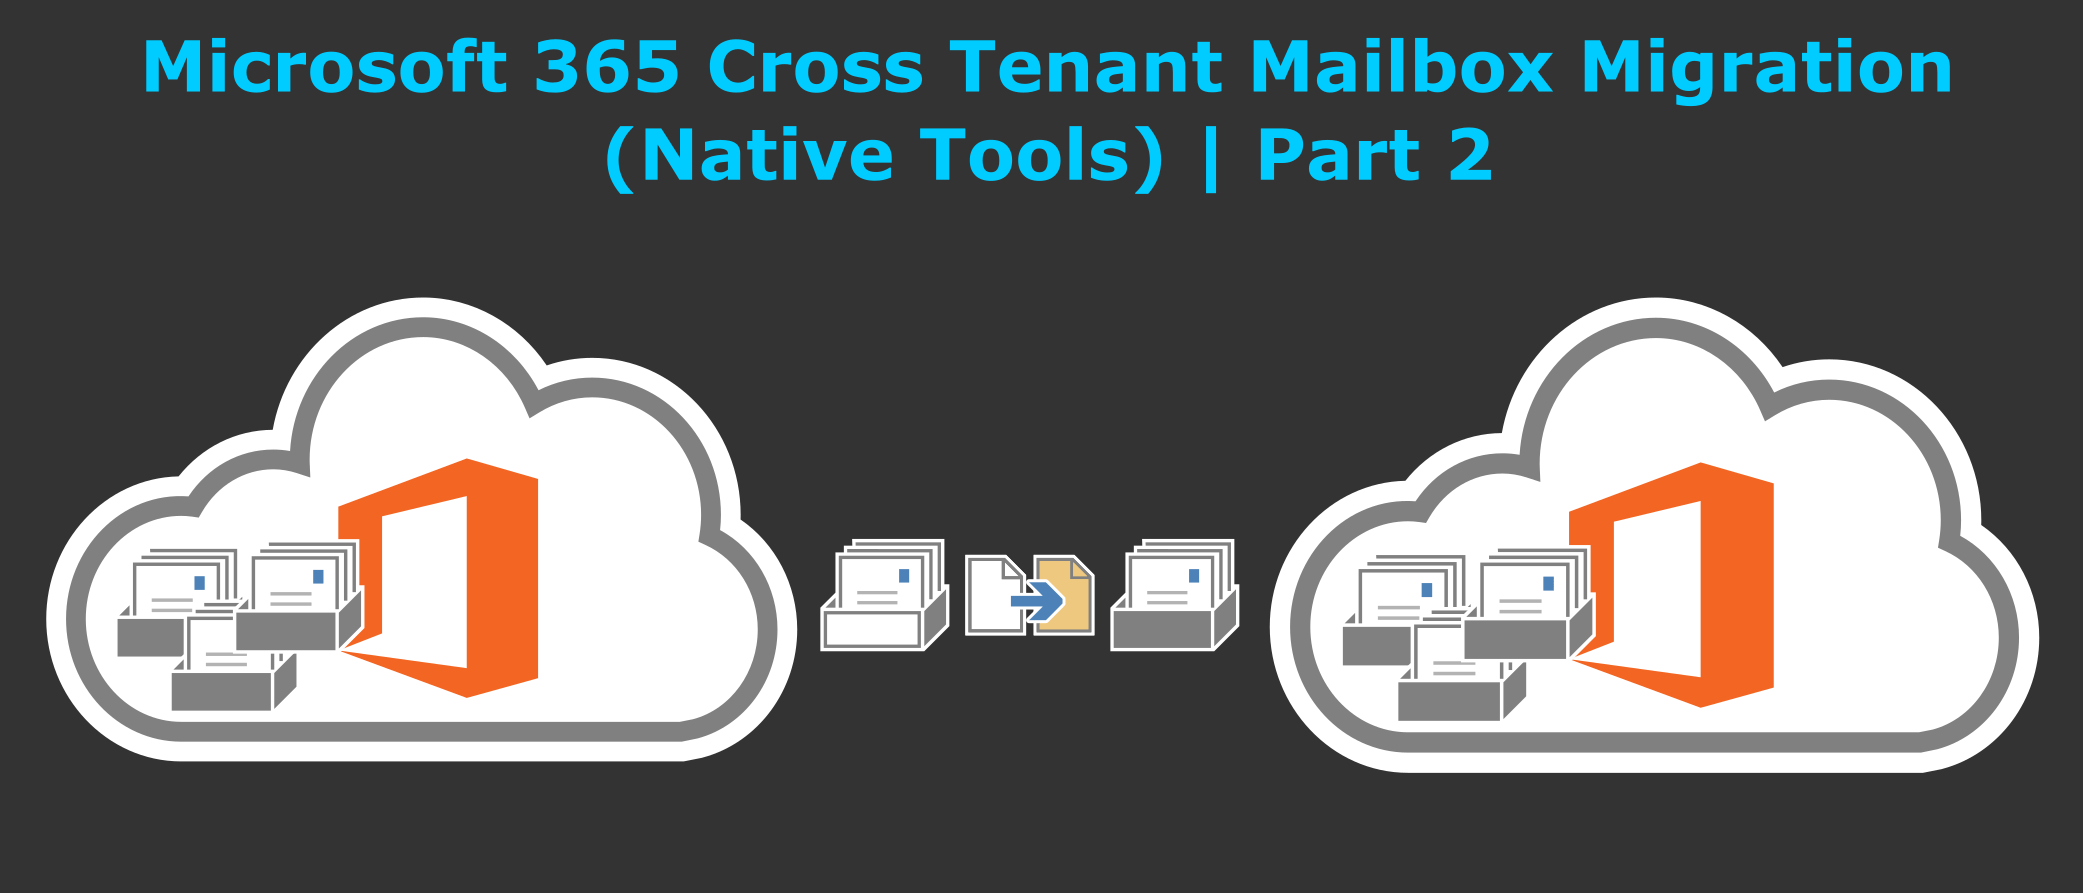
Creating *.CSV file for user mailbox migration

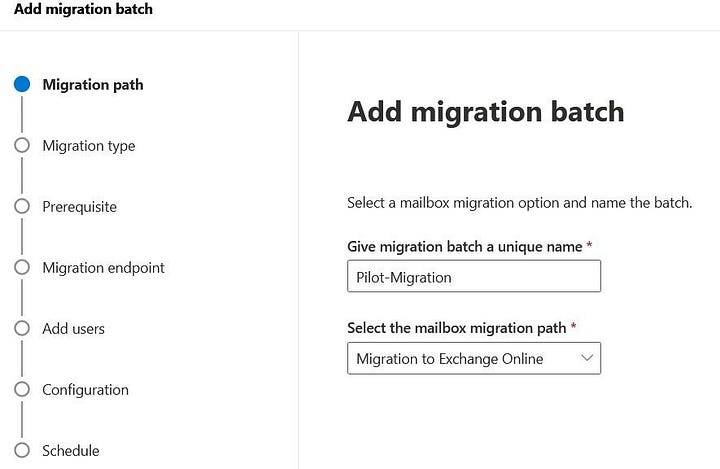
Creating Migration Batch
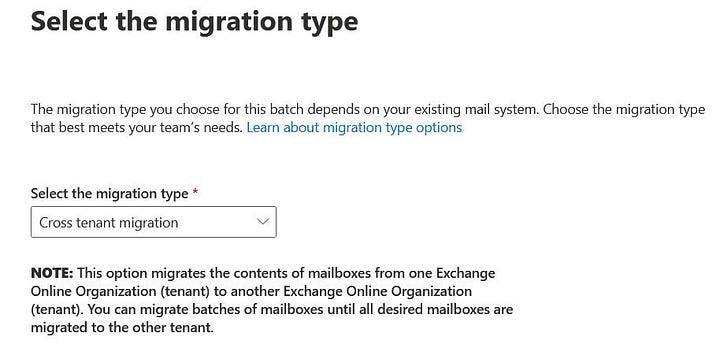
Select migration type

Add *.CSV file and your are good to go.
Once migration is completed the Mail User will be converted to User Mailbox automatically.
Migrated User Mailbox on source tenant will be converted to Mail User, so keep in mind it’s actually migration not just copying/syncing the contents.